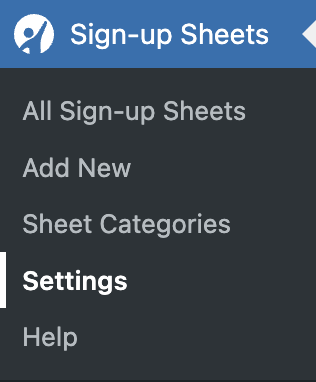
You can find the settings options for Sign-up Sheets under Sign-up Sheets > Settings. Below you will find a breakdown of each of the different sections.
Sign-up Sheet
Allows you to change the sorting of the sheets on the frontend sheet listing. You can select to sort them by one of the following in either ascending or descending order…
- Date
- This uses the sheet date set on the sheet (not to be confused with the publish date of the sheet)
- If you have the Pro version, this will also use the the task dates for sheets set to use them. In this case, it will use the end date of your task date range for the sheet.
- Screenshots below shows the locations of the sheet date and task dates.
- ID
- The automatic numeric ID assigned by WordPress, This will essentially sort your sheets in the order they were created.
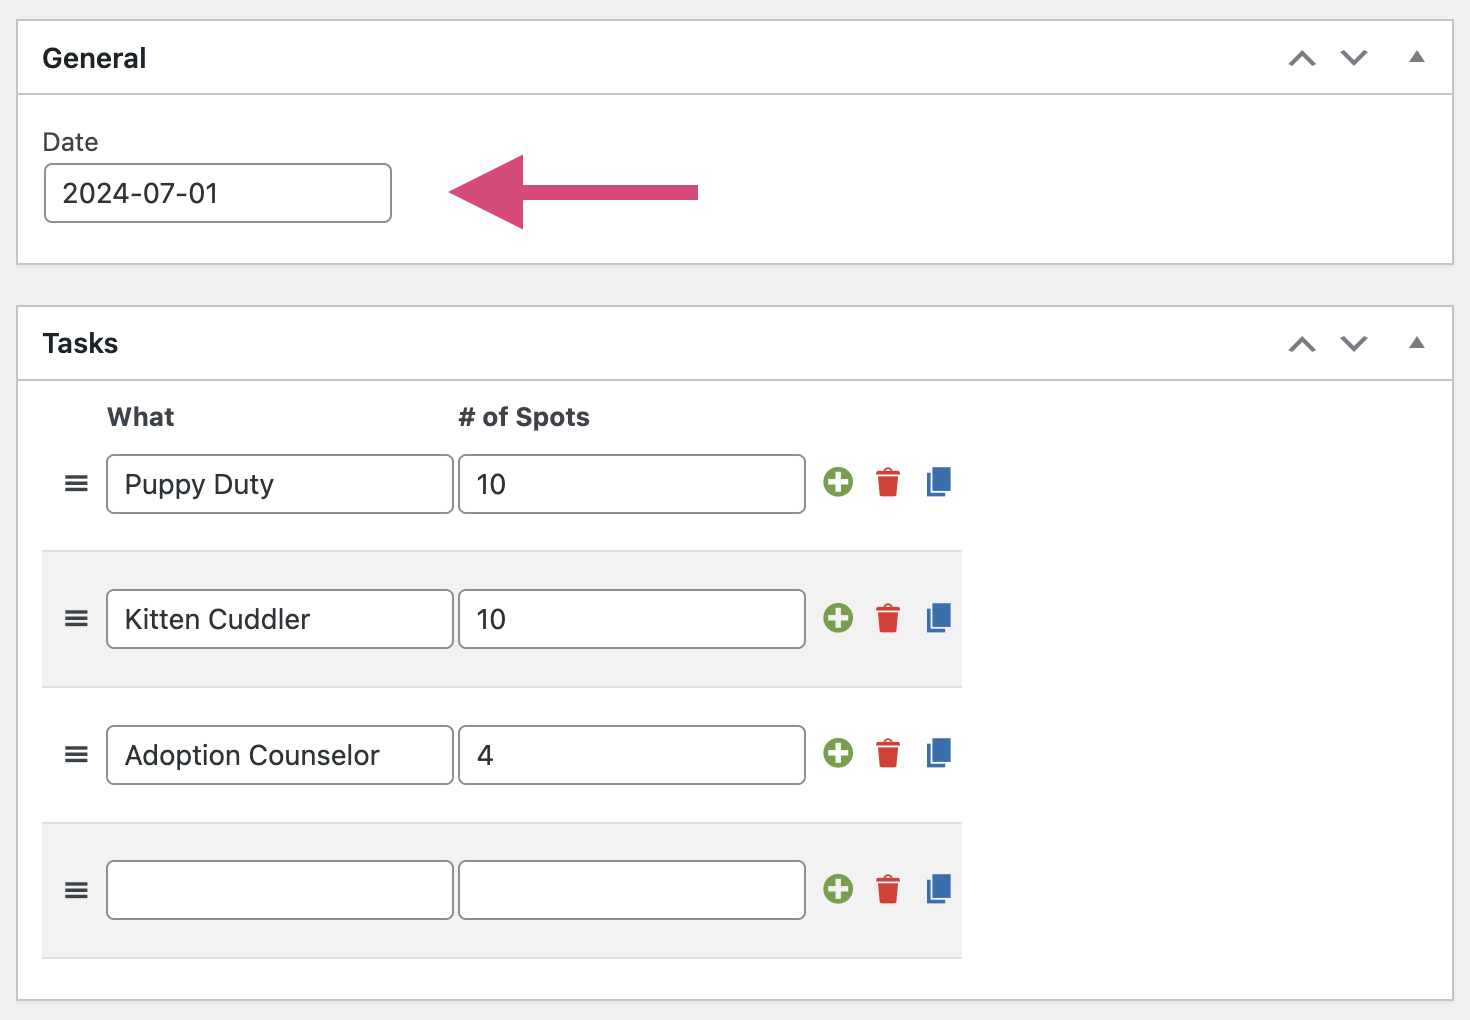
On the sheet edit page, the sheet date field is in the “General” section right above the list of tasks. 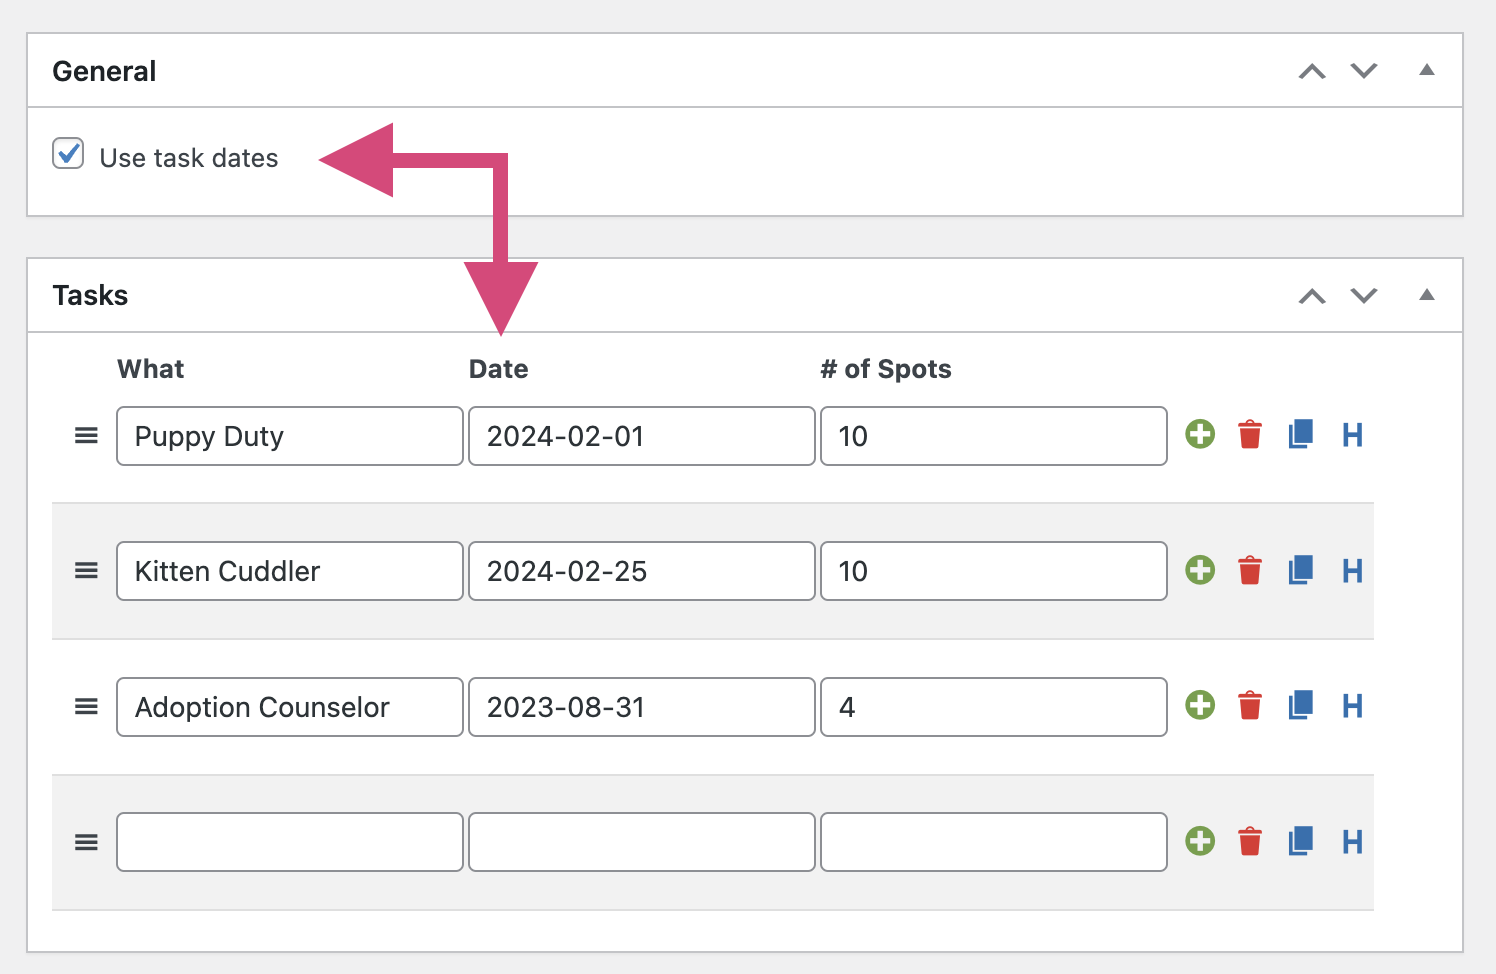
On the sheet edit page of the Pro version, the task date setting is found in the General section above the Tasks listing. Once checked, task dates will appear within the task listing.
Sign-up sheet table will appear much like the table when sign-ups are viewed via the admin. This option will display personal user information on the frontend like email, full name, address and phone. This option is best used if you are using the [sign_up_sheet] short code within a password protected area. (This also overrides the “Front-end Display Names” option and displays all as full names.)
Customize how the names display for the people that have signed up on your sheet. This only affects the front-end display of the sign-up sheet. In the admin, you will see the full name of the sign-up.
“John S.” – first name plus first letter of last name: For privacy, you can have the system automatically abbreviate the last name of the sign-up.
“John Smith” – full name: The full first and last name entered during sign-up. We recommend only using this for internal sites or sites that are locked down to a limited number of users for privacy reasons.
“Filled” – anonymous: Each spot will just be labeled as “Filled” on the frontend to provide complete anonymity for the users that sign-up.
Additionally, as of version 2.2.11, you have the option to override the display name of users who are logged in when the sign-up and instead display them in one of the following ways… Public Display Name, Nickname, or Username. These match the fields you will find when you view the user in the admin.
Show sign-up spots on one line with just # of open spots and a link to sign-up if open by using “Compact” mode.
Show open sign-up spots in one line with just a # of open spots and a link to sign-up along with additional lines only for filled spots with the names of those who sign-up by using “Semi-Comact” mode.
Learn more about Compact, Semi-Compact, and Standard Display Mode
Prevent users from being able to sign-up for a task more than once. This is checked by email address.
Prevent users from being able to sign-up for a task directly before or after a task for which they have already signed up. This is checked by email address.
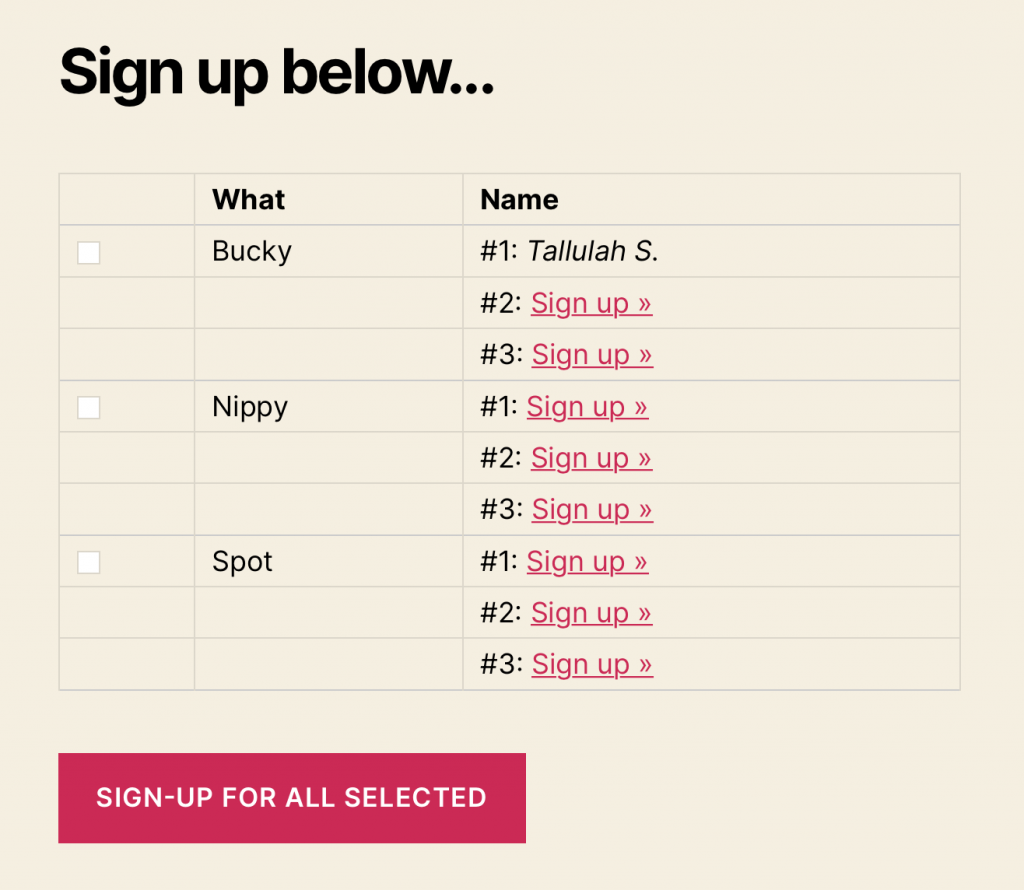
Allow check boxes on signup line items that allow user to sign up for multiple tasks.
When the user clicks to sign-up for a task, the spot will be locked and held for them for 3 minutes. Spot Lock is available when signing up for a single task at a time.
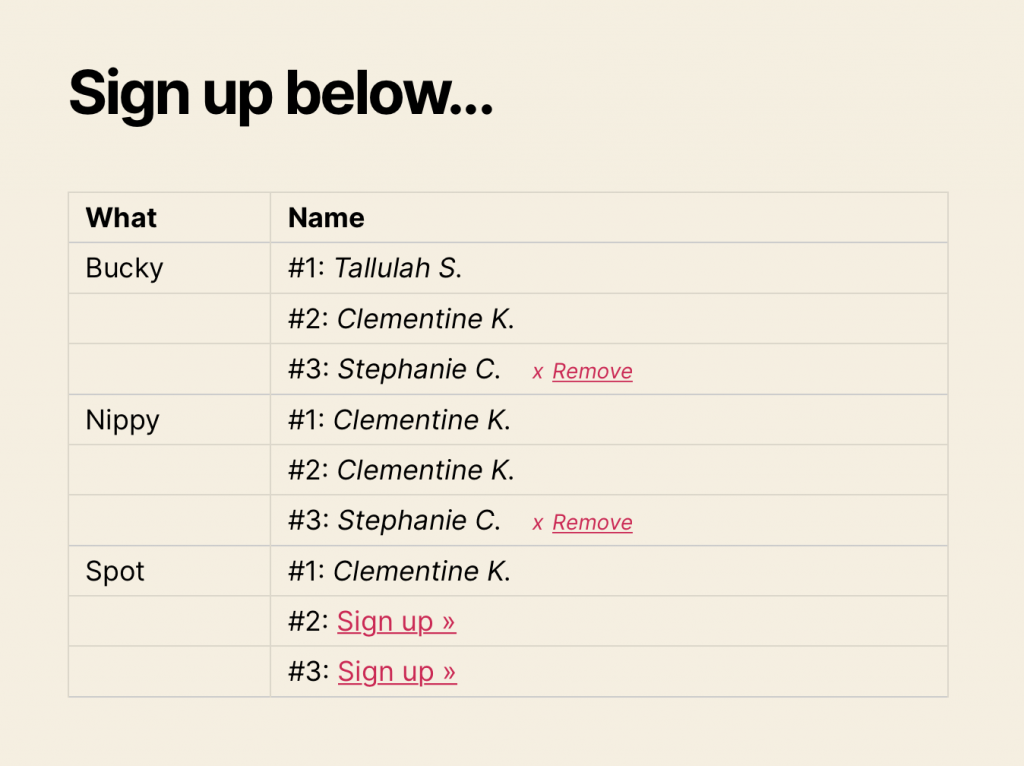
Hides the “Remove” link from the sign-up form if users were logged in when they signed up. When link is not hidden, they will see the remove link…
Number entered will calculate based on the task date, if set, otherwise it will use the sheet date. If no sheet and task date is set, editing will be allowed indefinitely. Use negative numbers to allow editing after the date has passed. Leave blank to disable the user edit feature.
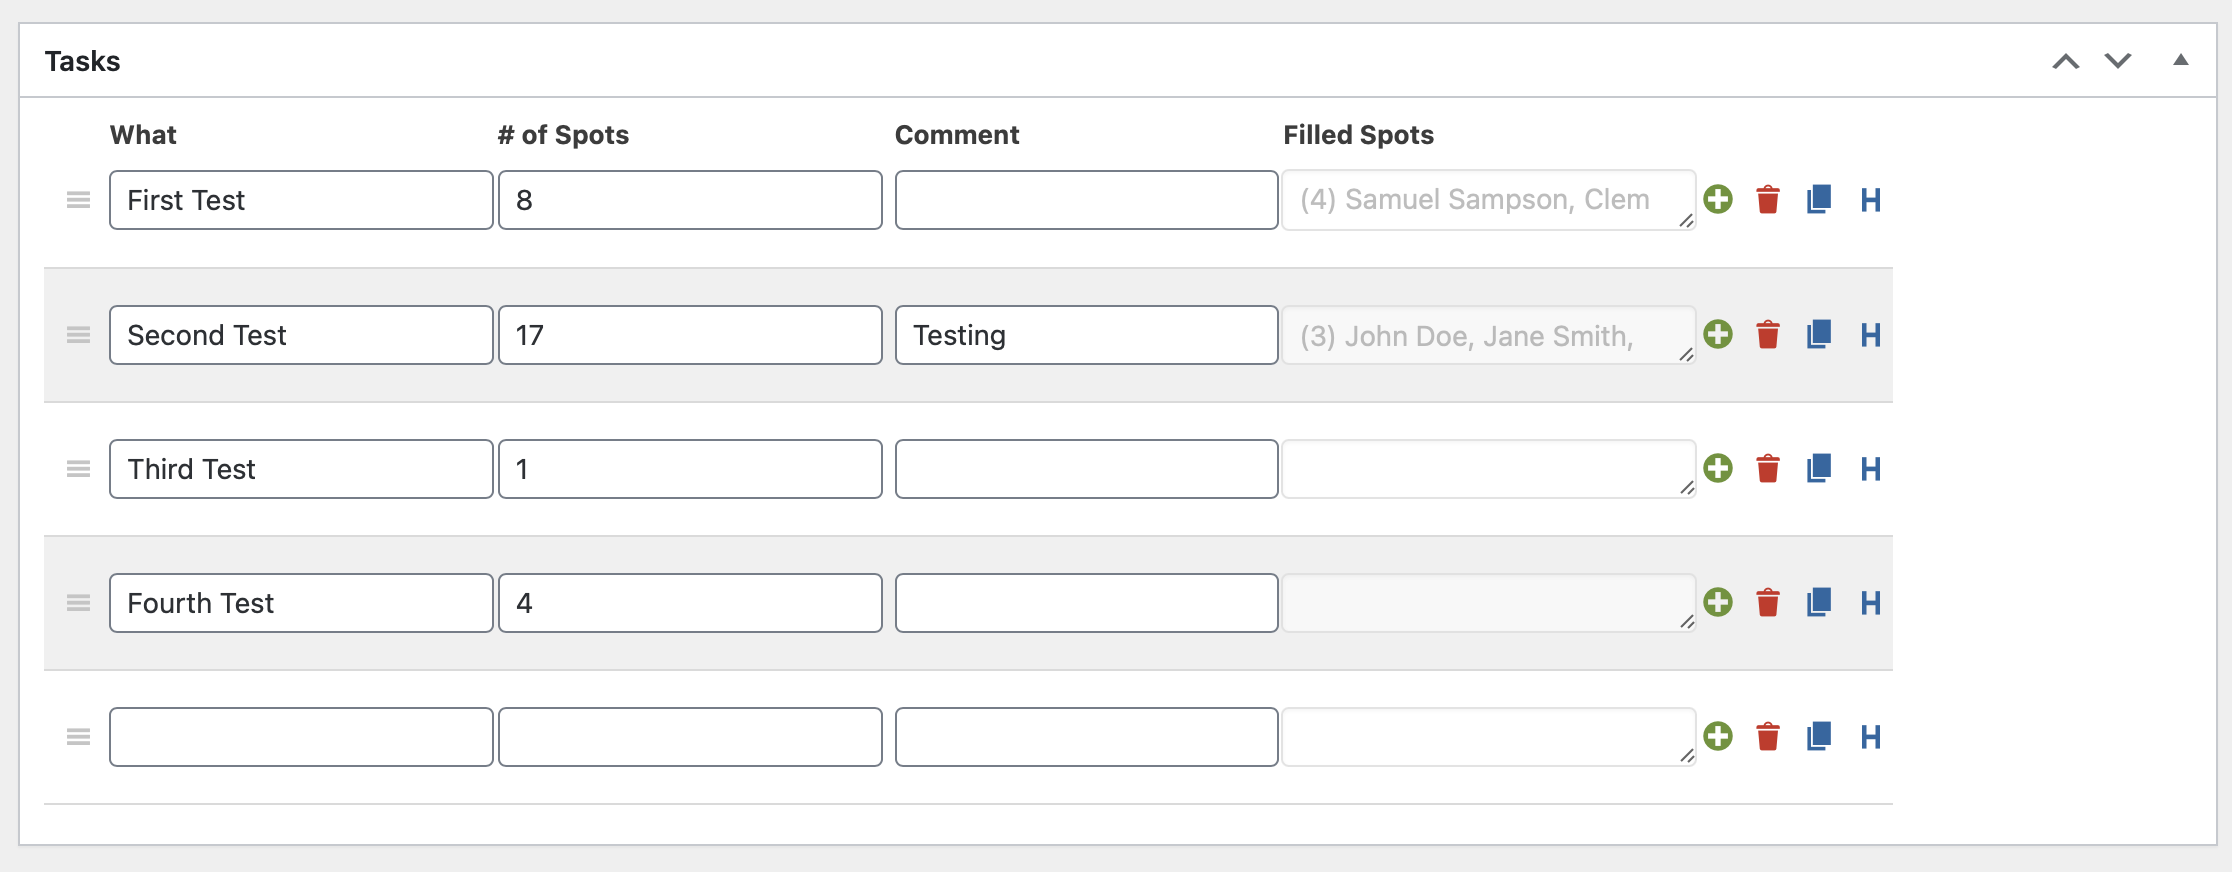
Enabling this, adds a “Filled Spots” field in the admin on your Edit Sheet screen so you can quickly see the total count and names of those who signed up for each task. This is for reference only. to edit these sign-ups, go to the Managed Sign-ups page for that sheet.
This settings allows enabling the ability to use the auto-clear feature. This feature is a great option to use for a recurring sheet where you don’t need to keep a historical record of the sign-ups.
Configured per sheet, you can set a sheet to clear every week on one or more days of the week.
Sheets will be cleared after mid-night the morning of the day(s) you select.
Note that unless you have specifically configured your server to trigger the cron on a regular schedule, the WordPress Cron natively works by running when a user accesses the site. So the first time your site is accessed after the scheduled time the job is supposed to run. If you set your auto-clear to run on Friday, the auto-clear process would be triggered to run the first time your site is accessed after 12:00am on Friday. On lower traffic sites or when you need your tasks to run on a more specific schedule, it’s recommended to hook WP-Cron into the system task scheduler on your server that way you can expect it to run just after midnight regardless of whether someone visits your site or not.
The timezone used will be the one set in your main WordPress Settings which you can configure at Settings > General > Timezone.
The Auto-Clear feature was added in version 2.2.9 of Sign-up Sheets Pro.
Custom Task Fields are for display only on the frontend. These are different than Custom Sign-up Fields which are added to the sign-up form which users can fill out.
Learn more about Custom Sign-up Fields.
Sign-up Form
Enable to add a “remember me” checkbox on the sign-up form which will remember the basic info filled out on that form. Helpful if users will be filling out multiple forms.
By default, this is a required field. Enabled this to set as optional.
By default, this is a required field. Enabled this to set as optional.
Enable to remove the phone field from the sign-up form altogether.
Enable to remove the address fields from the sign-up form altogether.
By default, for users that are logged in, their name and email auto-populates on sign-up form when available. This option disables that behavior.
The “Disable Mail Check Validation” setting disables email validation checks on the sign-up form. Learn more about sign-up form email validation checks.
The Sign-up Link Auto-Scroll to Sheet feature is enabled by default, but can be disabled by going in your admin to Sign-up sheets → Settings → Sign-up Form and then check this “Disable sign-up link auto-scroll to sheet” option.
Sign-up Link Auto-Scroll to Sheet bring the user back to the form/sheet as they click the “sign-up” link and submit their form. This is especially handy when you have a lot of content above your sheet. The video below shows an example of this where after the user is brought back down to the sheet, they can still access the other content by scrolling back up the page if needed.
Coming soon…
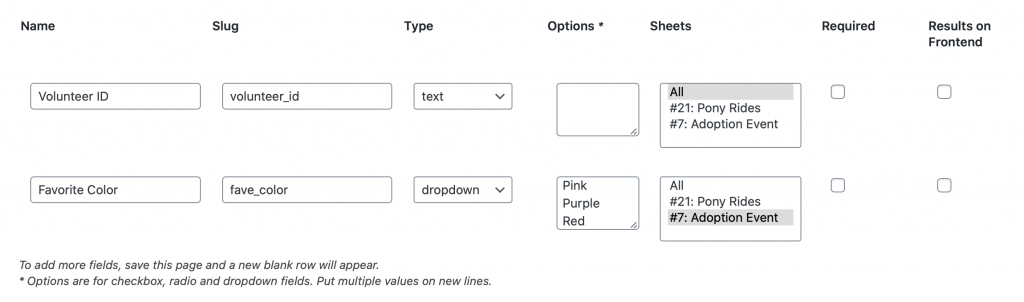
Add custom fields in the sign-up form that the users will fill in when they sign-up. They can be set on specific sheets or on all sheets. Field types include: text, textarea, checkboxes, radio, and dropdown.
Learn more about Custom Sign-up Fields.
CAPTCHA and SPAM Prevention
Confirmation E-mail
All version of the plugin allow you to change the e-mail subject and from email address. The Pro version also lets you add BCCs to the email, customize the message for the confirmation e-mail, and even lets you disable this email altogether
Learn more about the confirmation email.
Removal Confirmation E-mail
With the Pro version, you can customize the removal confirmation e-mail. You can use the following variables within the message to dynamically display data in the email.
{signup_details} – Multi-line list of sign-up details such as date, sheet title, task title{signup_firstname} – First name of user that signed up{signup_lastname} – Last name of user that signed up{signup_email} – Email of user that signed up{site_name} – Name of site as defined in Settings > General > Site Title{site_url} – URL of site
Reminder E-mail
With the Pro version, you can customize the reminder email. You can use the following variables within the message to dynamically display data in the email.
{signup_details} – Multi-line list of sign-up details such as date, sheet title, task title{signup_firstname} – First name of user that signed up{signup_lastname} – Last name of user that signed up{signup_email} – Email of user that signed up{site_name} – Name of site as defined in Settings > General > Site Title{site_url} – URL of site
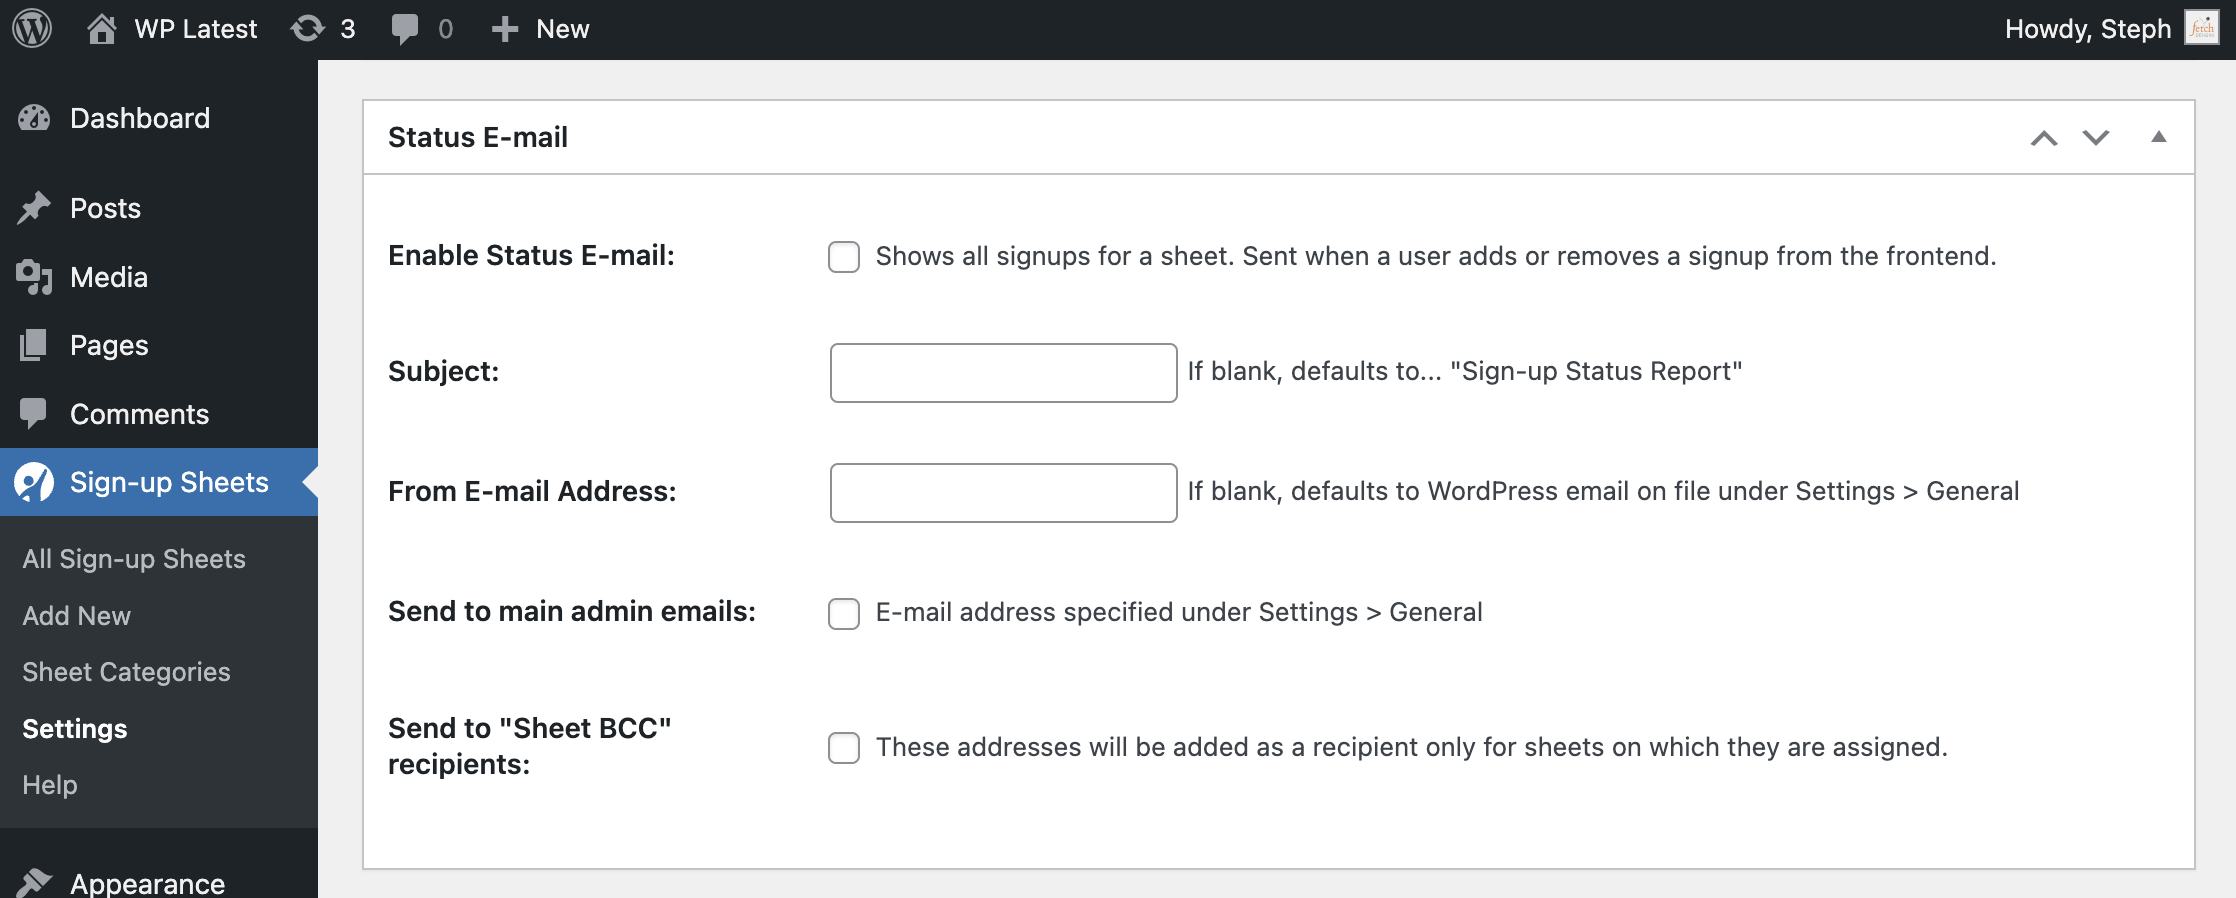
Status E-mail
With the Pro version, you have the option of enabling the Status Email, which is an email that is sent out anytime a user sign-ups for a spot or removes themself. You can configure this email to be sent to the site admin or the “Sheet BCC” email addresses set on the individual sheets.